December 19, 2011

The Story of the Slipcovers

I am so excited to share this project with you guys. It took the blood, sweat and tears of Britna, Janean and myself but it turned out amazing. So without further ado here is how the story goes.

...

Once upon a time there was a very sweet Queen, named Queen Britna of Forrest Ranch, who was going to throw a royal Thanksgiving feast, when she realized she needed more seating in her castle for all her guests. So she hunted all over her kingdom for the perfect chairs and fell in love a pair of blue wing backs. But the evil used shop owner would not make a deal with the queen, but instead wanted her to pay with most of her royal treasury. The wise queen said no, and thought "I should bring my sister in law, Duchess of Redding, to help me find a new pair of perfect chairs." So that is what the queen did, and the duchess pointed out a two of these...

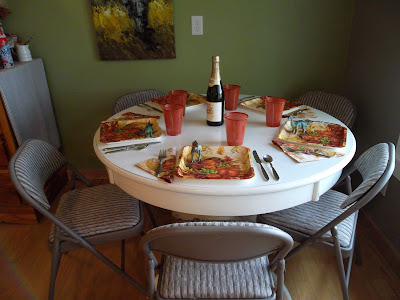
(They had seat cushions of course but we were eager to get started before the local artist got around to painting the picture)


The queen saw them and said "Those will be perfect!" So the queen and the duchess bought the fabric and headed back to the palace to start what they thought would be an easy project. The queen invited the help of a neighboring queen and world famous seamstress Queen Janean of Ono. All together they started measuring, cutting, and pinning


Side by side the queens worked constructing arm panels, making cushions, creating ruffles and more. And even when there fingers got pricked or there crowns fell askew they never got discouraged.


Meanwhile, the Duchess was busy pinning piping, cutting out panels and making trips into town. But the Duchess' most important job was to take care of the Prince. 


The Prince had jobs of his own of course, he was to test the quality of the fabric, and keep the machinery in working order.

So for 4 days the royal family worked, stopping only to eat and sleep. They didn't even mind it when the castle got a little messy for the end was in sight.


When all the sewing was done, and all the thread in the castle had been used up, this is what they ended up with...


The two queens and the Duchess wept with joy at having finished the project, even the Prince was happy to hear the sewing machines stop there whirring. 

Queen Britna got the chairs of her dreams just in time for the Thanksgiving Feast, Queen Janean was able to get her carriage to pick up her King at the airport on time and the Duchess Katlyn got her crafting fever taken care of and returned home to her King... and they all lived happily ever after. :) 

December 9, 2011

Noel Sign

I saw this beautiful Pottery Barn knockoff on pinterest and instantly fell in love.


So I decided to make my own!


This was so easy and fun to make this simple Christmas sign. It was cheap too, it only costs about $4 a letter at Michael's, then you need red and brown paint, and a glue gun. I used the brown paint first where I wanted the letters to look distressed, then I pained several layers of red paint over that. If you want it even more distressed looking you could always add brown paint around the edges to give it that "shabby" look. 


Don't you just love those projects that only take a little bit of your time but make a huge impact?!

December 6, 2011

Thanksgiving 2011

Now I know I promised to share more party pics, but with our old computer finally taking its last breath, it took with it all of our old pictures. Bummer. So instead Ill show you the wonderful Thanksgiving we had this year. My in-laws were so kind to have it at there house again this year and as usually my MIL did an amazing job.


She even set a up a cute kids table which included a toy dinosaur for the boys.


 Everyone in the family was assigned something to bring, which makes it so much easier on everyone involved. That way it isnt only one person trying to cook everything and everyone gets a chance to make there favorites. Everyone helped out in the kitchen too, even the guys. My FIL and his brother were assigned the gravy.


Apparantly it takes big muscles to make gravy, who knew? As usual the meal was absolutely delicious. We had turkey and a ham, sweet potatoes, green bean casserole, rolls, stuffing, salad and of course mashed potatoes and gravy.


There is something so special about having Thanksgiving with a big family. I didnt have it much growing up so its still a bit new to me. But I love it!


Usually on Thanksgiving my poor stomach just cant hold all the yummy food I want to eat, so this year I went in with a strategy.  I decided to leave out the roll, which takes up so much precious space (and leave that for yummy turkey sandwhich leftovers), then you leave room for all the real important stuff like the sweet potatoes ;)


I hope everyone had a wonderful Thanksgiving with there families too!

November 29, 2011

Party Time

So it occurred to me today that Ive never really shared my parties with you guys. I love to plan parties! I love deciding on a theme, then picking out cute crafts to make that will go with that theme. They are not always fancy parties, and maybe not even a technical "party" but just a decorated table for people to enjoy while they are at my house. But whatever it is, I love it. Since this blog is all about the things I love, why not share my pictures with you all?

 Its so fun to see how my "style" has changed and evolved through the years. Its also nice to look back at some of these pictures and see how often I had to use only what we had. The budget is such deciding factor when it comes to planning a party, but when on a tight budget it forces you to become even more creative and really think outside the box! Unfortunately with a lot of these parties, the budget was also small in the camera department so a lot of the pictures are blurry. he he.

Lets start it off with something festive. This was our first Christmas party after Evan and I got married. We were living in a little one bedroom apartment so it wasn't the best place to have a party, but hey that just means less space to decorate! 

One of the my favorite parts of a party is decorating the table. It makes the biggest impact and really puts you in the party mood.


Most of what was used on the table I had borrowed from my mother-in-law, which definitely saved my bacon (or at least my theme).

I made some place holders for everyone, one style for the girls and another for the boys.


I grabbed some spikey balls from the tree outside for my centerpiece.


 Then started on the cookin. Its quite interesting trying to cook a fancy Christmas dinner in a kitchen this small, but with the help of my mom and sister we were able to get it done.


We made the classics.
Sweet potatoes, rolls, green beans, a green salad and my first ever ham!


Mmm...


The food was good but the company was even better.


The next party we had in this apartment was a surprise anniversary party for Evans parents. They were celebrating 30 years! Since it was an anniversary party we went with the traditional material of pearl.

My sister in law made chocolate cupcakes decorated with pearls and their initials. I made banana cupcakes with honey cinnamon frosting. Did you know you can buy edible pearl dust to go in your frosting?! There is also little edible pearl candies too!


 I got this idea off of the Martha Stewart website to do a three sided picture frame.


You simply get three picture frames and take the backs off. Then you hinge them together to make a triangle, I think I just used tape, and print your pictures on vellum. Then you plop a candle in the middle and voila!

 Don't they make the cutest couple!


Well thats two of the parties I've planned and Ill show you a couple more next time. Hope you've enjoyed them!

November 21, 2011

Lets Try That Again

We've been at it again! We got that itch to do some painting around here again, and we are all loving the results. When we originally decided to paint our living room blue, we were more than a little nervous. We were afraid that it would look overwhelming, or like you just walked into a big blue ice box. So we played it safe and only painted three walls. We left the entryway and the half wall white to try and balance it out.


We had so much trouble adding some color and personality to that wall, and what you cant see from this picture is that to the left of this wall is the full white bead board wall of our dining room, which you can see here. So if you were sitting in the living room, all you saw was white. Boring!!

While I masked off the space, Ryan starting ripping off the old ugly trim.


Then I got to work painting the entryway and half wall.


 Not only did we paint the walls but we added a fresh coat of white paint to the back of the doors, and we added the new trim.


 Isn't it beautiful?!


It adds so much more personality to that area now that its not just white, and we may or may not be adding some kind of wainscoting to that wall in the future ;)


On on a side note, we also continued down that wall and painted the hallway! Since we recently had a computer switch I don't have a before picture for you :( But just picture a creamy yellow-ish tan color = not cute. We decided to keep it simple and go for a soft white. I looked on one of my favorite blogs Perfectly Imperfect, where she had listed all of her paint colors in her house. She used the color White Diamond quite a bit, so we knew we were getting a color that was tried and true.


 It brightened up the hallway and even made the light look less "orangey" colored. We had to replace the old thermostat, because next to the new white paint it looked yellowed and ugly. We just cant have that now can we? :) This hallway is a bit of a decorating difficulty. On the largest wall is the doorbell box and the thermostat which doesn't leave much room for hanging things. Any ideas? 

October 6, 2011

Make Believe Mantle

Ya know how when you notice something in your house that isn't quite what you want it to be, then all the sudden its all you can see when you walk into that room? Has that ever happened to you? Well, after we built our coffee table here and I took some pictures for this here blog, I was so annoyed by the look of our too small shelf. Its amazing how looking at a picture can really point something out to you that you hadn't really noticed before.


This shelf was put up in a hurry when we first moved in, trying to make it look a little more "homey" for our first visitors. It worked for awhile, but when we moved the big couch against that wall, it dwarfed the shelf even more. So after bugging my handy BIL and repeatedly showing him pictures I liked, kinda like this one...


and this one...

So one weekend while my husband and I were out of town, Ryan got a wild hair and decided to build one, (I swear it was like subliminal messaging) and look how good it turned out!


I love that it has that chunky mantle look to it. It is so much more fun decorating for fall when you have a make believe mantle.

Now I cant even begin to explain how he built it, all I know is that I love it :) Maybe someday, I will be brave enough to attempt that wonderful chippy look like the ones above. But for now it works just fine!


I am linked at Home Stories A 2 Z

Dining Room Chairs

So I never did show you all how our dining room chairs turned out after I reupholstered them! If you remember they were stained and old and looked like this...

Ewww! Not pretty.

Well after a little bit of work they now look like this!


I am so happy with the way they turned out. It was so easy to recover them and made such a dramatic difference. As I mentioned here I really wanted to try sewing on a stripe of lace down the center of the seat, because I loved the look of this chair.


So on one of the chairs I tried it.

It was pretty, but it just didn't look right with the style of the chair. Maybe when we buy a new dining room set that has a more country styled chair I can try this again. But as for now Ill just stick with the plain linen. :)

September 30, 2011

DIY Headboard

Around here we've been busy making all sorts of interesting furniture pieces for our house. Some of the most noticeable being our new headboards. Ryan made his out of an old pallet, honestly I didn't even know that they made pallets this big!


For a while he left it just raw wood, which looked good, just not quite finished. Last weekend he stained it, and built a new wooden frame to go around his metal bed frame. He also managed to find some old hinges while working in his parents old barn. They go so well with the "industrial rustic" look he has going in his room. 


Meanwhile over in our room I decided to make a headboard using more of the old aged fence boards we had. I cleaned them up, then traced the shape I wanted. I only had to trace one side, then Evan could use the cut pieces to trace the other side so it would be symmetrical. Originally, I was going to paint the headboard a distressed white, but I fell in love with the color of the aged wood.


 It has made such a difference to the look of our room. I love that it has a more feminine shape, but then the coloring of the wood brings in the masculine.


That's all for now. Ill try and share more of the projects were working on soon!

I was featured at Perfectly Imperfect